Putting the Embroidery Hoop Design to the Test
When I first opened this machine embroidery design file, I admit I smiled. The concept is delightfully self-referential: an embroidery hoop design made to be stitched with an embroidery hoop. It is the kind of design that feels like an inside nod to everyone who loves this craft. As someone who has reviewed hundreds of embroidery files over the years, I have learned that clever concepts do not always translate into clean stitching. So I put this embroidery hoop design through real project work to see how it holds up under a needle, in a hoop, and eventually in the hands of a paying customer.
This review comes from the perspective of a designer who also runs a small shop. I tested this design on a custom tote bag intended for a local craft fair, and I also stitched a version on a sweatshirt for a friend who runs a boutique. I wanted to see whether this design works as a standalone piece, a decorative accent, or a product that builds brand identity for an Etsy seller. Here is what I found.
A Clever Concept That Lands Well
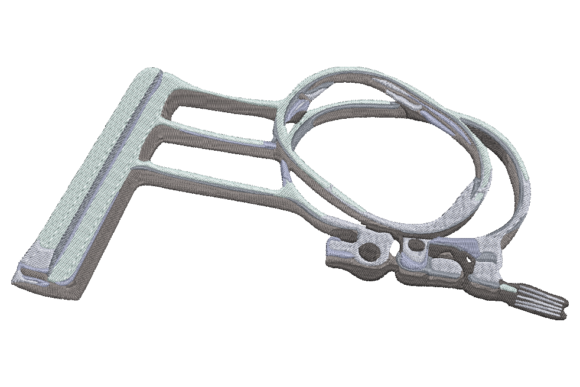
The first impression of this embroidery hoop design is playful and warm. It captures the shape of a wooden hoop with a style that feels both modern and nostalgic. The layout is clean, and the level of detail is appropriate for a design that is meant to be recognized quickly. It does not try to do too much. The visual personality is friendly and inviting, which makes it a natural fit for projects aimed at fellow crafters, sewing enthusiasts, or anyone who appreciates handmade goods. The mood it creates is one of shared passion. It says, “I made this, and I love making things.”
For a machine embroidery design, first impressions matter because they determine whether a customer will stop scrolling on Etsy or in a digital product catalog. This design stops the scroll. It feels like something a hobbyist would stitch for themselves and something a small business owner could use to connect with their audience. It belongs in the Hobbies category, but it also fits well in boutique product lines, personalized gift shops, and handmade marketplace listings.
From Digital File to Tote Bag
I decided to test this embroidery design on a blank canvas tote bag. Tote bags are forgiving in terms of fabric texture, but they also show every detail of a stitch. I used a medium-weight cutaway stabilizer and hooped the fabric with care. The design stitched out cleanly on the first try. The satin stitch elements were crisp, and the fill stitch areas had good coverage without feeling overly dense. The running stitch details added a nice hand-drawn quality that kept the design from looking too mechanical.
After stitching, I stepped back to evaluate the finished product. The embroidery hoop design sat naturally on the tote bag, and the size felt balanced. I imagined carrying this bag to a craft fair or a sewing meetup. It would start conversations. It would make people smile. That kind of reaction is gold for a small shop product. The design does not need a lot of explanation. It communicates instantly.
I also tested it on a sweatshirt. Sweatshirt fabric has more stretch, so I used a tear-away stabilizer with a light fusible backing. The design handled the fabric movement well. There was no distortion, and the stitch density did not cause puckering. This is a design that works on stable woven fabrics and knit fabrics alike, as long as you prepare the fabric properly.
Where the Design Performs Best
After several test stitches, I can see this embroidery hoop design working beautifully on a range of products. Here are the applications that stood out during my testing:
- Custom apparel: Sweatshirts, t-shirts, and denim jackets all benefit from the friendly, handmade feel of this design. It works as a chest or sleeve accent.
- Tote bags and canvas projects: The design sits naturally on a tote bag. It becomes a statement piece that says something about the person carrying it.
- Embroidered patches: Because the design is self-contained and has a clear shape, it makes an excellent patch. Stitch it on twill, cut it out, and add it to a jacket or backpack.
- Baby and kids items: The playful nature of the design works well on baby clothes, bibs, or nursery decor. The detail level is not too fine for smaller items.
- Holiday and personal gifts: For a sewing friend or a family member who loves crafting, this design makes a thoughtful gift on a pillow cover, tea towel, or apron.
- Small shop merchandise: If you sell digital embroidery files, this design is a strong addition to your product line. It is also a great printable mockup item for showcasing your work.
- Boutique products: The design has a clean, polished look that fits well in a boutique setting. It does not feel mass-produced.
This design also works well for commercial embroidery projects. If you are producing finished products for a craft business or a local shop, this embroidery hoop design adds a personal touch that customers notice.
Points to Watch Before You Stitch
No design is perfect for every situation, and this one has a few areas that require attention. I want to be honest about where this design might need extra care so you can avoid common pitfalls.
- Small hoop sizes: If you try to stitch this design in a very small hoop, the details may become crowded. Check the hoop size requirements before you commit to a tiny project.
- Thin or delicate fabric: On lightweight fabric like a fine cotton or silk, the stitch density may show through. Use a suitable stabilizer and consider a water-soluble topping to keep the stitches clean.
- Stretchy fabric: As with any design, knits and stretchy fabrics require proper stabilization. Test on a scrap piece first to confirm the design does not distort.
- Dark fabric: If you stitch this design on a dark background, make sure your thread colors have enough contrast. The design relies on clear shapes, so low contrast can make the details hard to read.
- Curved surfaces like caps: The design has a round shape, which works well on caps, but the stitch density may require a firm stabilizer to keep the design from shifting.
- Frequent washing: For items that will be washed often, like kitchen towels or baby bibs, use a high-quality stabilizer and confirm the thread colors are colorfast. The design should hold up well, but preparation matters.
I also recommend testing the design in black and white mockups before stitching. This helps you see the contrast and layout without wasting thread. Compare how it looks on light and dark fabric backgrounds. The design is versatile, but it rewards careful planning.
How the Design Elevates Product Value
One of the most important things I evaluate as a designer is whether a machine embroidery design adds value to a finished product. This embroidery hoop design does. It has a professional, intentional look that raises the perceived quality of the item it is on. A tote bag with this design feels like a curated product, not just a plain bag with a random stitch. A sweatshirt with this design becomes a conversation piece. A pillow cover with this design feels like a gift from one maker to another.
For small business owners, this design helps build brand consistency. If you sell handmade products or digital embroidery files, the visual personality of this design aligns with a crafty, approachable brand. It also works well in printable mockups for your shop listings. Customers can see the design clearly and imagine it on their own projects.
From a buyer engagement perspective, this design invites connection. It appeals to people who love embroidery, sewing, and handmade culture. It is the kind of design that makes someone say, “I need to make that.” That reaction is what drives sales in a craft business.
Designer Notes Before You Stitch
Before you use this embroidery hoop design in your own projects, here are a few practical notes I always share with my students and clients:
- Test on scrap fabric first. Always. Even if you are experienced, a test stitch reveals thread tension issues, stabilizer problems, or color mismatches.
- Check thread color contrast. The design has a clear visual structure, but contrast makes it pop. Test your chosen thread colors against the fabric.
- Review stitch density. If the design feels too dense for your fabric, adjust the density in your software or choose a lighter stabilizer.
- Confirm hoop size. Make sure your hoop is large enough for the design. Hooping too small can cause misalignment.
- Inspect small details. Look at the satin stitch and fill stitch areas. If any detail is too fine for your fabric, simplify or enlarge the design.
- Test in black and white. This helps you see the design’s structure without the distraction of color.
- Use proper stabilizer. Cutaway for stable fabrics, tear-away for knits, and water-soluble topping for napped fabrics.
- Confirm licensing. Before using this design for commercial projects, selling finished products, or including it in digital product bundles, check the license terms. This is especially important for Etsy sellers and digital product sellers.
These steps take extra time, but they save you from wasting materials and disappointing customers. A well-prepared embroidery project always looks better than a rushed one.
The Bottom Line on This Embroidery Hoop Design
This machine embroidery design is a solid choice for anyone who wants to create projects that feel personal, handmade, and intentional. It is clever without being gimmicky. It stitches cleanly on a variety of fabrics. It works for personal gifts, small shop merchandise, and commercial embroidery projects. It adds value to finished products and helps build a brand that feels connected to the crafting community.
If you are an embroidery designer, a small business owner, an Etsy seller, or a hobbyist who loves embellishments and sewing, this embroidery hoop design is worth adding to your collection. It is the kind of design you will reach for again and again because it makes people smile. And in this business, that is exactly what you want.